Azure Service Principal
Kostavo connects to Azure Databricks workspaces using a Microsoft Entra ID (Azure AD) service principal. This guide covers the exact permissions required and the setup steps.
Required Permissions
Create a custom role in Azure that grants these two permissions:
| Permission | Purpose |
|---|---|
Microsoft.Databricks/workspaces/read | Read workspace metadata and discover workspaces |
Microsoft.Databricks/workspaces/assignWorkspaceAdmin/action | Grant the service principal workspace-admin access to monitor and manage resources |
These are the minimum permissions Kostavo needs. The service principal does not need Contributor, Owner, or any other built-in Azure role.
Step 1: Create an App Registration
- Go to the Azure Portal → Microsoft Entra ID → App registrations
- Click New registration
- Name it (e.g.,
kostavo-service-principal) - Leave the default settings and click Register
- Copy the Application (client) ID and Directory (tenant) ID; you'll need both
Step 2: Create a Client Secret
- In the App Registration, go to Certificates & secrets
- Click New client secret
- Set a description and expiry
- Click Add
- Copy the secret Value immediately; it's only shown once. Do not copy the Secret ID.
Step 3: Create the Custom Role
- Go to Subscriptions → select your subscription → Access control (IAM)
- Click Add → Add custom role
- Name it (e.g.,
Kostavo Databricks Access) - Switch to the JSON tab and add these permissions:
{
  "permissions": [
    {
      "actions": [
        "Microsoft.Databricks/workspaces/read",
        "Microsoft.Databricks/workspaces/assignWorkspaceAdmin/action"
      ],
      "notActions": [],
      "dataActions": [],
      "notDataActions": []
    }
  ]
}
- Set the assignable scope to the subscription or resource group containing your Databricks workspaces
- Click Review + create
Step 4: Assign the Role
Assign the custom role to your service principal at the appropriate scope:
Subscription level (recommended; enables auto-discovery of all workspaces):
- Go to Subscriptions → select your subscription → Access control (IAM)
- Click Add → Add role assignment
- Select your custom role (
Kostavo Databricks Access) - Under Members, select User, group, or service principal
- Search for your App Registration name and select it
- Click Review + assign
Resource group level (limits scope to workspaces in that resource group):
Same steps, but navigate to the specific resource group instead of the subscription.
Step 5: Add to Kostavo
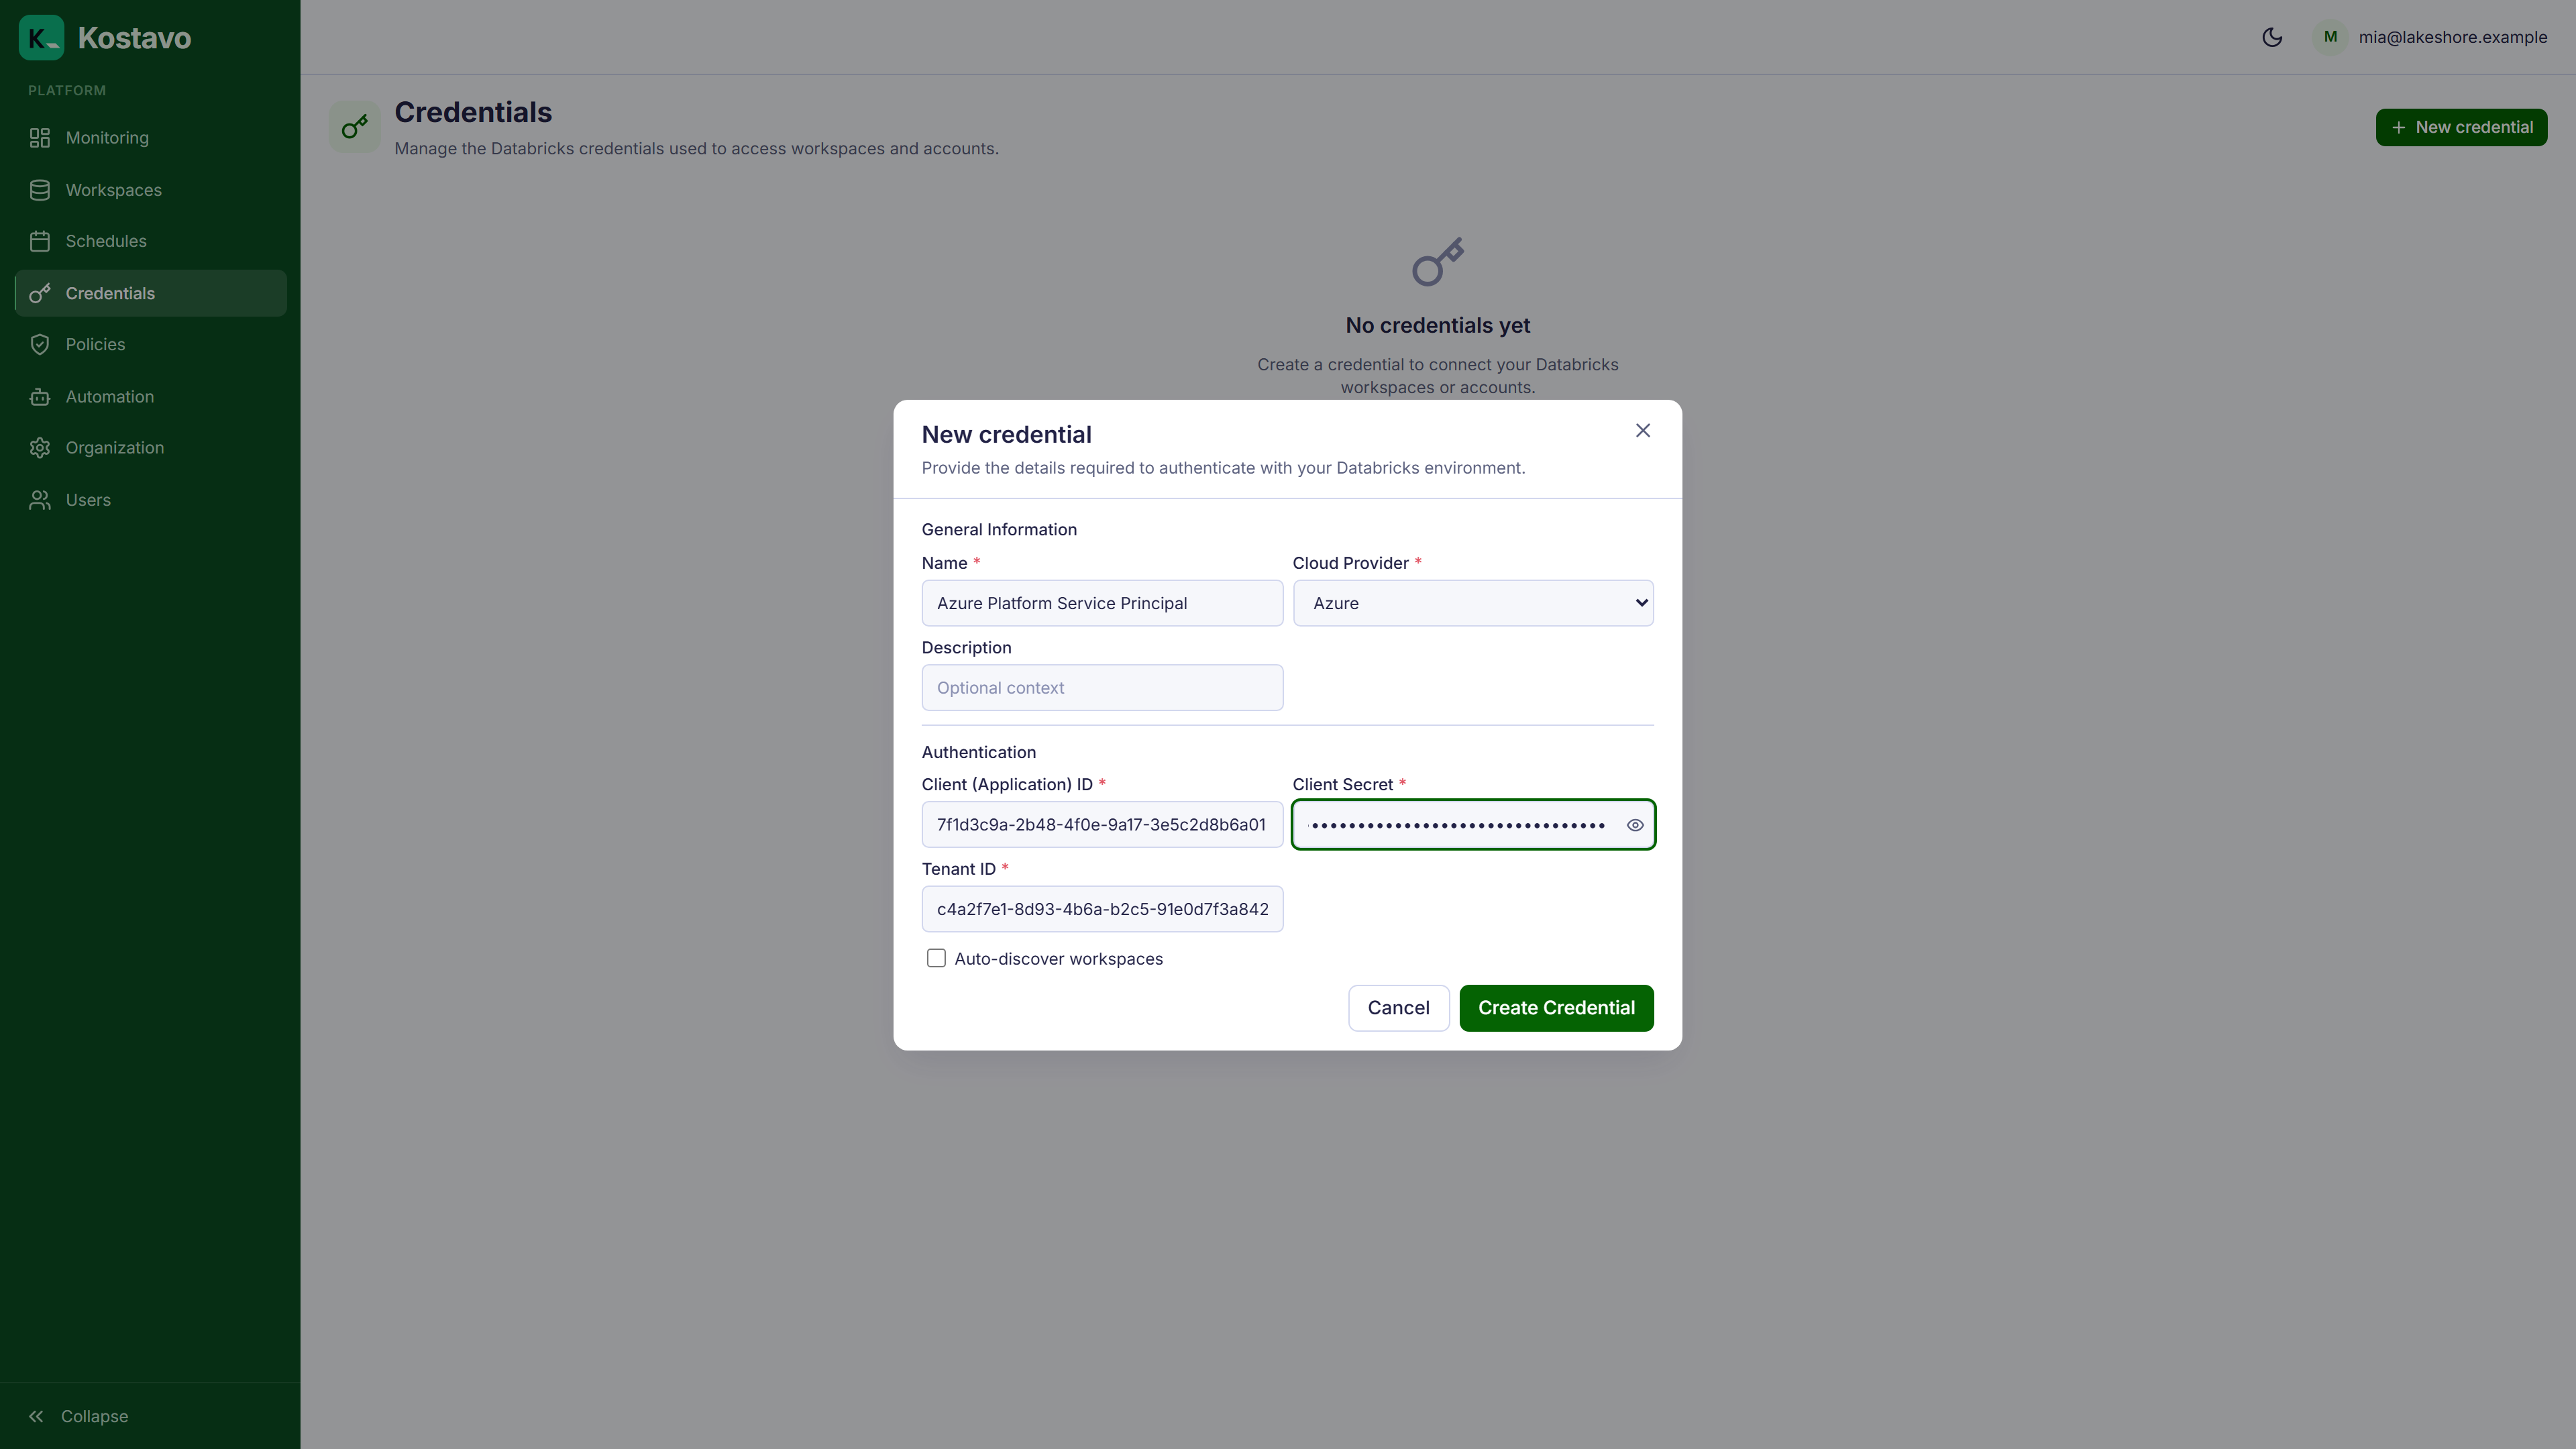
In the Kostavo onboarding wizard or the Credentials page, create a new Azure credential with:
| Field | Value |
|---|---|
| Client ID | Application (client) ID from Step 1 |
| Tenant ID | Directory (tenant) ID from Step 1 |
| Client Secret | Secret value from Step 2 |
After saving, the credential is ready to use. The first real test is workspace enrollment: with a correct role assignment, auto-discovery lists the workspaces the service principal can read. If discovery comes up empty, see Troubleshooting.
Scope and Discovery
| Assignment Scope | Auto-Discovery | Workspace Access |
|---|---|---|
| Subscription | All workspaces in subscription | All workspaces in subscription |
| Resource Group | Workspaces in that resource group | Workspaces in that resource group |
| Individual Workspace | No discovery | Only the assigned workspace |
For most setups, subscription-level assignment is recommended: it allows Kostavo to discover new workspaces automatically as they're created.
Secret Rotation
When the client secret approaches expiry:
- Create a new secret in the Azure App Registration
- Update the credential in Kostavo with the new secret value
- Delete the old secret from Azure once Kostavo is using the new one
See Managing credentials for the in-app rotation flow.
Related
- Guide: Adding workspaces is the next step once the credential is saved
- Guide: Managing credentials covers editing, rotation, and troubleshooting
- Guide: AWS credentials for the AWS equivalent